Form-Associated Custom Elements
Use the new form-associated custom elements and ElementInternals standards to create accessible custom elements which behave like native HTML form controls.

Form-Associated Custom Elements are a new web standard by which to build custom interactive form controls like buttons, inputs, checkboxes, etc. They present a path forward for design-systems and other custom element authors to more deeply integrate with the web platform. In this post, we'll build a simple FACE to get a feel for the APIs.
How Does this Help?
FACE adds crucial accessibility and interactivity features to web components, closing gaps between web components, framework components, and native browser controls. Before FACE, web component authors had to apply one of a number of workarounds each with their own trade-offs.
Teams developing FACEs can now implement accessible custom controls with simpler HTML APIs while retaining the benefits of Shadow DOM.
But before we get to the code, some history:
Skip the history bit
How we Got Here
The web components v1 standard originally defined two kinds of custom elements. The most popular kind is called and autonomous custom element, and it's what most people think about when they think of web components. The other kind is called a customized built-in element, and they look like this:
class XButton extends HTMLButtonElement {
  static is = 'x-button';
}
customElements.define(XButton.is, XButton, {
  extends 'button',
});
You use CBIEs like this:
<button is="x-button">I'm an XButton</button>Notice the big differences here: XButton the customized built-in extends HTMLButtonElement, not HTMLElement, and when you register it, you have to pass both the custom element name x-button as well as the localName of the button element it extends. When using it in HTML, the localName of the element is button and the is attribute determines which subclass of HTMLButtonElement to upgrade with.
The chief advantage of customized built-ins was that they came with all the original features of their base elements, well, built-in. So a custom-element author wouldn't need to implement a bunch of stuff to make their custom textfield go, rather they could just extend the existing HTMLInputElement class and get all the necessary and expected functionality (especially crucial accessibility features) for free. Typical OOP stuff. So if customized built-ins are so great, how come this post isn't about them and how come we rarely see them?
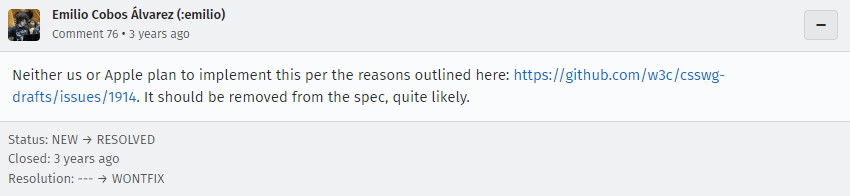
Unfortunately, although customized built-ins remain a part of the spec, you should not build them. The reason for this is discouraging: despite the spec's ratification, Apple's WebKit team stated that they would decline to implement customized built-ins.
Since WebKit enjoys an artificial monopoly on iOS devices, the WebKit team's decision has an outsized effect on the industry. Think "US Electoral College", but for web browsers. Their decision not to implement makes customized built-ins a non-starter. Some prominent web developers (most notably Andrea Giammarchi) have advocated permanently adopting a polyfill, but the broader web components community has generally acquiesced to WebKit's decision.
Which is how FACE came to be, it's the alternative to CBIEs that the WebKit team championed.
Workarounds
Before FACE, page authors using custom elements had two options to submit forms with data from their web components:
- The "decorator pattern" - slotting native controls into autonomous custom elements
- Using JavaScript to manually submit form data
Each of these had their pros and cons.
The Decorator Pattern
The most versatile workaround for autonomous custom controls involves slotting native controls into the custom element.
<x-checkbox>
  <input type="checkbox">
</x-checkbox>
The advantages to this approach include <noscript> support and hassle-free form participation. The disadvantages include HTML noise and awkward styling due to the current limitations of ::slotted(). This is compounded by the requirement to <label> elements, leading to stricter HTML requirements, copying nodes into the shadow root, producing hidden light DOM nodes, or other workarounds-for-the-workaround.
Manually Submitting Forms
Developers working on SPAs might opt instead to put their native inputs in the shadow DOM and use JavaScript to submit the form data to a JSON API. Here's a simple example of how that might work:
form.addEventListener('submit', function(event) {
  event.preventDefault();
  const body = JSON.stringify(somehowCollectFormValuesFromCustomControls());
  const { action, method = 'POST' } = form;
  fetch(action, { method, body });
})
Given the right abstractions this approach could be quite productive for developers, but ties the controls to JavaScript.
Creating a FACE
Form-Associated Custom Elements solves one of the problems that is and customized built-in elements would have solved, namely, allowing your web component to participate in native web forms.
We create a FACE by setting the static formAssociated boolean flag and registering the custom element.
class XCheckbox extends HTMLElement {
  static formAssociated = true;
}

customElements.define('x-checkbox', XCheckbox);
A Free Lunch
So what does this give us? Well, right off the bat, that one static class boolean adds a number of form-related behaviours to our otherwise plain element. The name, form, and disabled attributes now work the same as native <input> elements, and the presence of the readonly attribute will prevent the browser from trying to validate your field, although you're still responsible to make the control actually non-editable. Naming your FACE and specifying a form (by child composition or via form attribute) adds it to the form's HTMLFormControlsCollection, as well, if the element or it's containing <formset> has the disabled attribute, it will gain the CSS state :disabled.
<form>
  <fieldset disabled>
    <label for="xcheck">Check?</label>
    <x-checkbox id="xcheck"
                name="checkit"
                value="checkit"></x-checkbox>
  </fieldset>
</form>
In the above snippet, our custom checkbox is disabled on account of its containing fieldset, and the form submits with its value on checkit. Removing disabled from the fieldset also unsets it from the element, without the element author needing to apply any extra code.
We also get some new lifecycle callbacks:
formAssociatedCallback(form: HTMLFormElement)runs when our element is associated with a<form>, either by being it's child or by setting the element'sformattribute to the id of the form.formDisabledCallback(state: boolean)runs when the element'sdisabledstate changes, either because it or it's containing fieldset'sdisabledattribute changed.formResetCallback()runs when the element's associated form has it'sreset()method called. You can use this e.g. to reset to a default value.formStateRestoreCallback(reason: 'autocomplete'|'restore')runs when the browser autofills the form. It takes a single argument of type'autocomplete'|'restore', depending on whether the browser called it because of an autocomplete or a navigation.
All of that comes for free, even before implementing any actual custom control behaviour. So let's add in the actual checkbox stuff now, just like we would have done before the new standards.
Customizing the UI
Let's start by writing an accessor pair to link our element's checked property to the corresponding HTML attribute:
get checked() { return this.hasAttribute('checked'); }
set checked(x) { this.toggleAttribute('checked', x); }
Built-in checkboxes set their value DOM property to either the value attribute's value or the string on, so let's do that too:
get value() { this.getAttribute('value') ?? 'on'; }
set value(v) { this.setAttribute('value', v); }
We'll add checked and value to our observedAttributes list, then call our connectedCallback (providing a highly aesthetic UX), in attributeChangedCallback.
connectedCallback() {
  this.#container.textContent = this.checked ? '✅' : '❌';
}

attributeChangedCallback(name, _, value) {
  switch (name) {
    case 'checked': this.checked = value != null; break;
    case 'value': this.value = value; break;
  }
  this.connectedCallback();
}
And last we'll add some keyboard and pointer interaction
constructor() {
  super();
  this.addEventListener('click', this.#onClick);
  this.addEventListener('keydown', this.#onKeydown);
  this.attachShadow({ mode: 'open' })
    .append(XCheckbox.template.cloneNode(true));
}


#onClick() {
  this.#toggle();
}

#onKeydown(event) {
  switch (event.key) {
    case ' ':
      event.preventDefault();
      this.#toggle();
  }
}

#toggle() {
  this.checked = !this.checked;
}
Now that our checkbox looks and feels like a checkbox, the last thing to do is to hook into the browser's HTML form lifecycle with another new standard, ElementInternals.
Form Interactions
Along with FACE, ElementInternals gives custom element authors new capabilities. Specifically, element internals are a standard place to implement things like form control validation and accessibility. ElementInternals is designed as a catch-all bag of properties and methods for working with custom elements. We can expect expansions to its capabilities in the future, but for now it contains three parts:
- A reference to the element's shadow root, if it exists
- Form-related properties
- Accessibility-related properties
HTMLElement get a new standard method called attachInternals() which returns an ElementInternals object. This method may only be called on autonomous custom elements and will throw if called on built-ins, customized or otherwise. You hook your control's custom implementation into it's associated form with ElementInternals' form properties.
Let's create our ElementInternals object by calling attachInternals, and store it on a private class field.
#internals = this.attachInternals();Then, in our connectedCallback, we'll apply the checkbox' value to it's FormData entry:
this.#internals.setFormValue(this.checked ? this.value : null);That setFormValue call is part of the ElementInternals secret sauce. Calling it with a non-nullish value adds our control's value to the form's FormData object, whereas calling it with null removes the value.
We can also implement form validation in our custom controls with the following internals properties and methods:
willValidate(): booleanchecks whether the element will be validated when the form submitssetValidity()sets the element's form validity statecheckValidity()andreportValidity()work just like their native counterparts.
Custom validations are a big topic so let's save their more in-depth explanation for another day.
Accessibility
The other major feature of ElementInternals are it's a11y-related properties role and aria*. Part of the AOM, we can now set ARIA properties imperatively without needing to set aria- attributes. These are critical capabilities which previously only had partial workarounds.
Let's start by setting the role so that screen readers announce our element as a checkbutton. Note that as of this writing Firefox (107) has not yet implemented role reflection, so we'll do some feature detection
if ('role' in ElementInternals.prototype)
  this.#internals.role = 'checkbox';
else
  this.setAttribute('role', 'checkbox');
We'll update our connectedCallback to render to the a11y tree as well as the DOM. Like role reflection, we'll apply a workaround for Firefox:
if ('ariaChecked' in ElementInternals.prototype)
  this.#internals.ariaChecked = String(this.checked);
else
  this.setAttribute('aria-checked', String(this.checked));
Putting it all together, our custom checkbox:
- implements it's own bespoke UI
- participates in HTML forms like a native input
- is accessible to users of assistive technologies
Simple Checkbox Example
<form id="form">
  <fieldset id="set">
    <legend>This fieldset controls <code>x-checkbox</code></legend>
    <label for="xcheck">XCheckbox value</label>
    <x-checkbox id="xcheck"
                name="checkit"
                value="custom element checked"></x-checkbox>
    <label for="native-check">Native checkbox value</label>
    <input id="native-check"
           name="native"
           type="checkbox"
           value="native checkbox checked">
    <label for="submit">Submit to display form state</label>
    <button id="submit">Submit</button>
  </fieldset>
</form>Browser Support and Polyfills
As of initial publication, Chromium (Google Chrome, Microsoft Edge, Brave, Arc) supports the full range of APIs described here. Firefox supports attachInternals and formAssociated but does not support ARIA and role reflection. WebKit does not support any of the new APIs, but the commits to add support have been merged, so the next Safari Technology Preview is likely to add support.
| Engine | FACE | ElementInternals | AOM Reflection |
|---|---|---|---|
| Chromium | ✅ | ✅ | ✅ |
| Firefox | ✅ | ✅ | ❌ |
| WebKit | ❌ | ❌ | ❌ |
The inimitable Caleb D. Williams has kindly published an ElementInternals polyfill which weighs in at ~6kb over-the-wire. Since the spec involves hooking into browser stuff which is otherwise unavailable to developers, the polyfill is not 100% spec compliant. For example, ARIA reflection is implemented by adding aria- attributes to the host element, where the spec states that they should not be added. The polyfill also adds a workaround for the custom state part of the spec, which was not covered here.
Errata
- : Added info and links to polyfill
Thoughts? Corrections? Comments? Let me know on mastodon.